

Jim Krause | Classes | P351 Video Field & Post Production
Lab #1
Agenda:
- Introductions
- Review lab policies
- Review cameras
- Begin Field Shoot Exercise (due before lab next week)
Welcome & Introductions: Who are you? What movies or TV shows do you like to watch? What are you interested in making?
Lab/Class policies: (Quick Review of policies & checkout procedure)
- Know the lab policies, lab hours (Posted on door), and how to check out equipment. We've got a checkout system you can access on-line: https://mschoolcheckout.indiana.edu. (Needs an on-campus or VPN connection to work.) You've got to be registered before you can check out gear. You can also reserve gear in advance.
- Use the loading dock to pick up/drop off gear (for short periods of time).
- Give extra time for checking out and returning gear.
- When you return equipment, be sure cables are wound and make sure everything is neat & accounted for. Expect to go through gear with lab monitor
- Be considerate when shooting in/around the RTV Building - Do not obstruct hallways or shoot in restrooms.
Camera Overview: Good camera operators are artists and engineers. In addition to knowing the principles of composition and photography, it's important to know the camera, lighting, audio and working with talent.
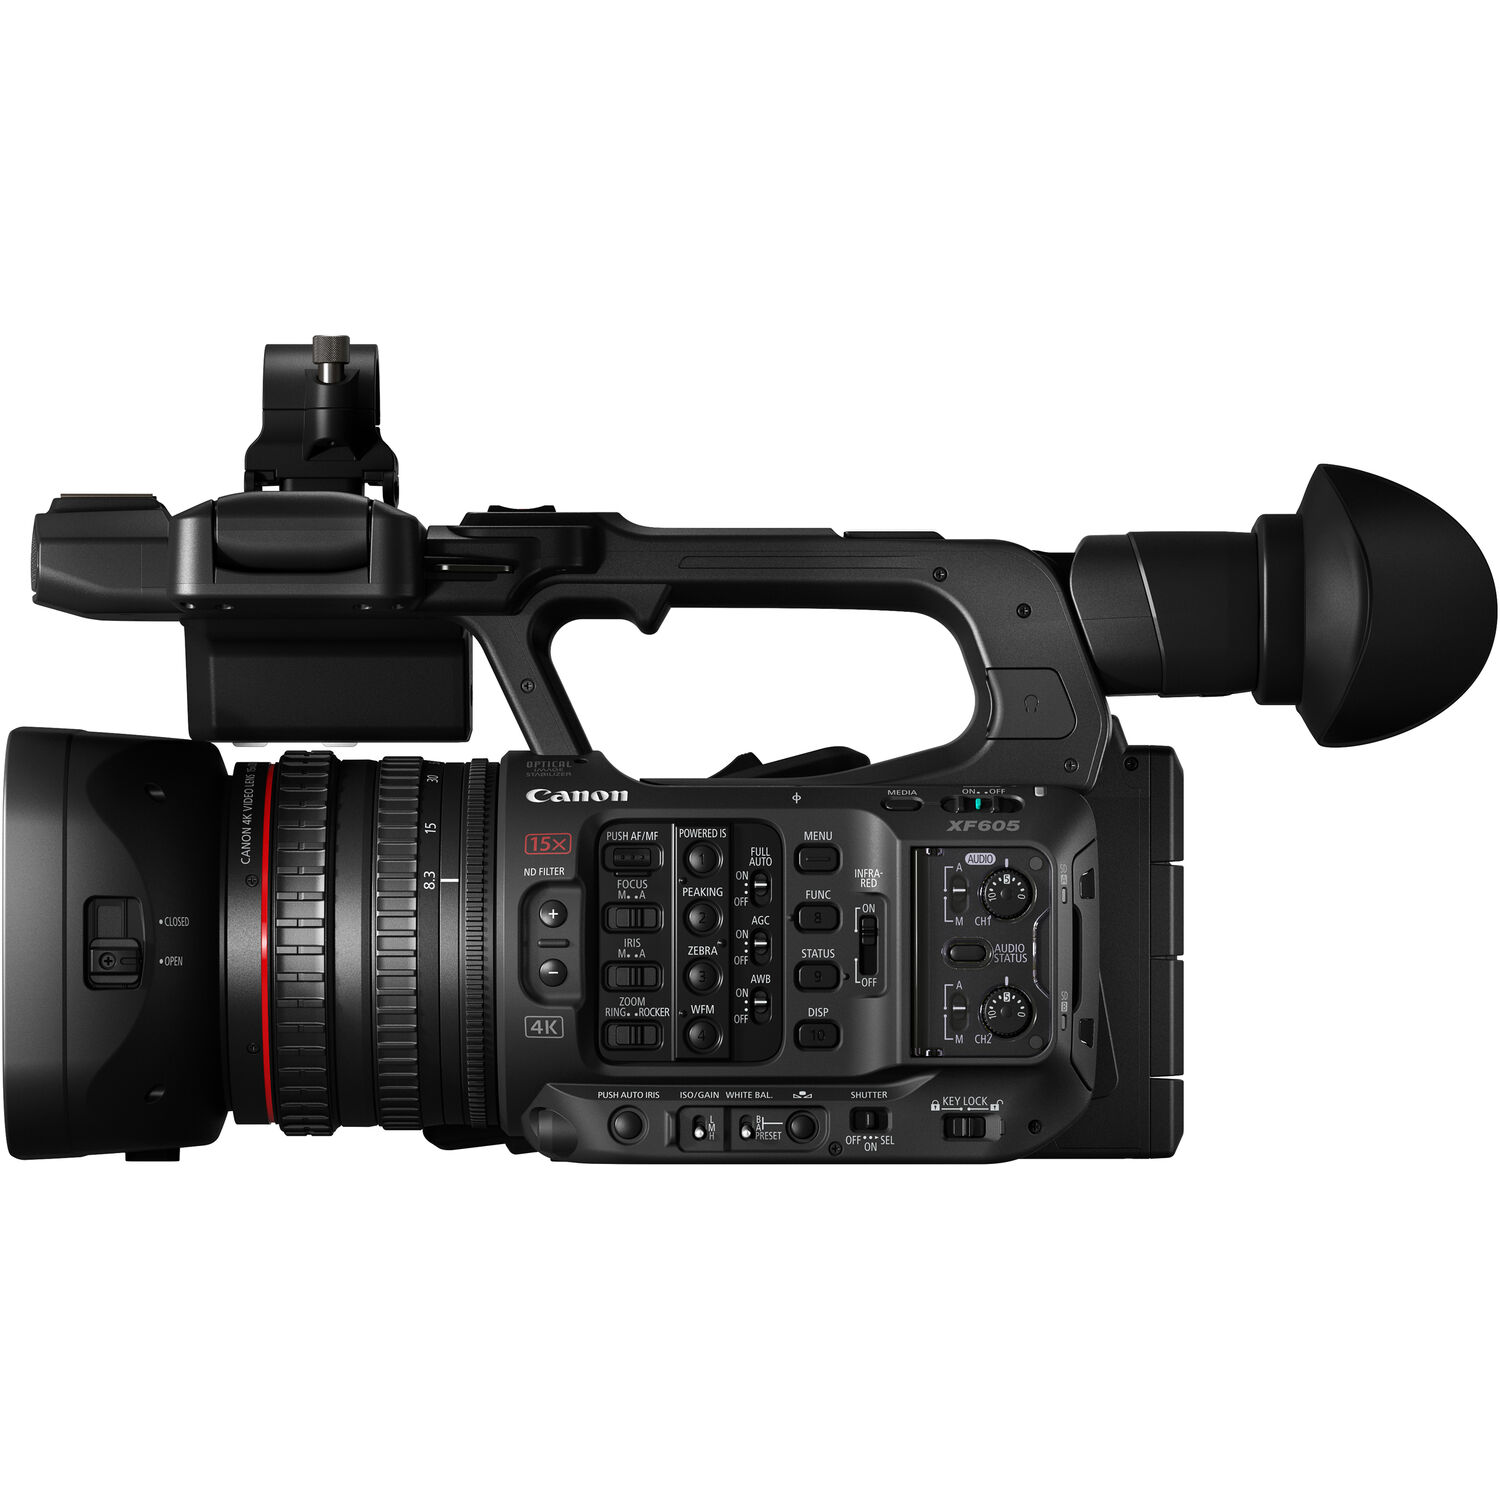
Canon XF605 Camera tour:
- Manual (PDF) Side profile image (JPG)
- Inserting batteries / release button on top
- Power switch
- Media button
- Initialize Media - It's good to erase/format your card for each shoot. (3rd menu category.
- Recording Format: XF-AVC vs MP4 . 50 Mbps is high quality, 35 Mbps is fine
- Frame Rate - 1080/60i (29.97) for TV and 1080/24 (23.98) for film/theatrical release.
- Color Bars There's no color bar switch but it can be assigned to a button via the menu controls or accessed via the menu. It's common practice to record color bars at the head of any tape, media, or batch of clips. (3rd screen over in the Recording Setup category) They are useful for adjusting and calibrating monitors. View color bars to check/set the monitor's brightness/contrast before you make judgments based on its appearance.
- Rear viewfinder - Useful on a sunny day. Be sure to adjust the diopter (or it'll be out of focus).
Basic Controls:
- White Balance - Always Check as it is likely NOT right. You can manually WB into the A or B settings or use a preset (outdoor or tungsten). You can also manually dial into a color temperature.
- Lens
- Focus AF/MF button on LCD door. Know how to manually get crisp focus (Zoom in and press the "Magnify" button to zoom in for detail. Then turn off and zoom back out.)
- Manual/Auto Focus: When you see MF in the viewinder, you are in manual focus mode (usually best).
- Zoom: (Ring can be switched from Focus to Zoom) Response speed of ring and top handle switch can be adjusted via the menu settings.
- Gain/Aperture: You can set these in the FUNC menu. It's best to shoot with 0dB video gain but this is not always possible. You can also use the front control knob to adjsut both.
- Depth of field: This is the range of distance that objects
appear to be in focus. Sometimes you want a deep depth of field (sweeping panoramas) sometimes a shallow one (CU or portrait).
- Aperture: A smaller aperture (large f-stop, such as f-22) has a greater depth of field than a large aperture (small f-stop, such as f-2).
- Wide shots have the largest apparent depth of field. Everything will have a tendency to look in focus. This is best for hand-held and steadicam/jib shots.
- ND filters: Used to reduce the amount of light coming into the camera. These are essential, especially when one wants to shoot with a small f-stop (large aperture) in bright conditions.
- Audio
- Recording format (MP4 or PCM) must be set via the Recording Format menu. PCM is best.
- Check the switches to set Int Mic or Input (XLR terminals).
- Mic/line inputs (48 volt Phantom power for condenser microphones)
- Auto gain control (AGC) - Manual is usally best
- Audio monitor/headphone channels and volume must be set via the menu.
- Shutter - In Manual mode you should see 1/60 on the viewfinder (or 1/48 if you're in 24p mode). Going to a faster shutter speed (E.g. 500) will reduce the amount of light entering camera. Good for fast action slow motion and grabbing stills.
- Timecode - Found in Recording Setup menu, 3rd category. (Preset vs Regen) Producers often like a unique time code hour start value for each location or shoot. (A shoot in location "A" might be assigned to start at 12:00:00:00.)
How to Set Proper Aperture/Exposure
Monitors and viewfinders are convenient but don't trust them until you they are calibrated or you observe color bars through them . Always check the appearance of SMPTE color bars through your viewfinder/monitor before making exposure decisions based on how things look.
Exposure Bar - This visual indicator can help- but the camera is assuming it's looking at an 18% grey card (which reflects as much light as it absorbs).
Zebra stripes are a visual aid found on most professional camcorders and can assist with achieving proper exposure. Zebra stripes appear when a preset IRE level (luminance value) is reached. On the Canon XF405 you only have 2 choices: 70 and 100 IRE. You canset them through FUNC then Exposure menu. Don't use zebra stripes unless you know what they are set for.
Common IRE levels:
- 100 IRE - The brightest, legal luminance value allowed
- 65-70 IRE - Caucasion skin color under normal illumination
- 7.5 IRE NTSC black level (obsolete)
- 0 IRE - ATSC (digital)
TIP: I set my zebra stripes for 95 IRE. This way when they appear on the brightest areas of the frame (E.g. sunlight-lit, white fluffly clouds) I know I still have 5 more IRE of headroom.
Some cameras have waveform monitors which are an ideal tool for examining brightness (luminance) levels and determining proper exposure. Not many cameras have them- but they can be brought into the field as a stand-alone external test device. Waveform monitors display brightness or luminance information in the form of a visual graph.
USE the camera's build in ND filters if you have too much light coming into the camera.
How to Set Proper Focus
The best method is to zoom all the way into your subject, press the expanded focus button, set focus, and then turn off the expanded focus feature and zoom back out.
Tripods:
- Set height to optimum level to manipulate horizon in relation to subject. Check to see if you are looking down or up on subject (by default you should be at eye level).
- Make sure the camera is level. Slightly tilted shots look bad. A dramatically tilted/canted camera shot can be good to use (known as a Dutch angle), but one that's just slightly off looks bad.
- Whem mounting a camera onto a tripod, never let go unless you are absolutely sure it's secured.
- Never leave a camera unattended on a tripod unless you are ABSOLUTELY SURE the tripod is locked off and nothing (E.g. wind or a passerby) will knock the camera over.
- Develop the habit of unlocking the pan & tilt before you move the camera and locking it as soon as you are finished.
"Before you shoot" Checklist:
- Do you have all of the proper gear? (Batteries, media, camera, tripod, headphones, etc.)
- Set the recording format, frame rate, and bitrate? (E.g. 1080i 35 Mbps)
- Make sure your White Balance is properly set. (Indoor/Outdoor/Manual, etc.)
- Clear your camera: Turn off Neutral Density filters, Gain, and Shutter (unless you want them).
- Timecode preset/regen?
- Is you audio recording properly?
- Record a test clip & check audio/video.
General Shooting Tips:
- Camera level?
- Is your shot well-composed?
- Always capture at least 3 seconds of pre-roll and post-roll
- Before shooting, don't just think about the shot, but about
the entire sequence:
- Rule of threes: Consider the shot that comes before the one you are shooting, what you are shooting, and what comes after.
- What specific action or point is motivating your edit?
- Are you following the rules of continuity (Think about the line and follow the 180 rule, no jump cuts, etc.)
- Always try to make mini-continuity sequences.
- Shoot 2 more establishing shots than you think you need
- Add depth/motion whenever possible (block and shoot along the Z axis)
- Tell your story with close-ups
- Use a tripod (unless you have a really good reason not to)
- When you do go handheld, be sure to stay wide - don't zoom in and out whatever you do!
- Always record (good) audio - even if it's just with the camera mic.
Cold Weather:
- It's OK to go from warm to cold. You can use the camera immediately if you go outside in cold weather.
- Going from cold to warm is problematic as condensation forms on the gear. (That's why glasses fog up when you come inside.) Give gear and lenses time to gradually warm up before using. Don't store a camera somewhere cold and expect to use it someplace warm immediately.
- The heat of summertime is enough to cause problems. Be sure to give your gear time to warm up if stored inside where it's air-conditioned.
Go through p351 Field Shoot Exercise. Be sure to cover white balancing, setting timecode, and getting rack focus shots.
NOTE: To view or edit clips you can use Adobe Premiere. Insert your SD card into an iMac SD card slot. You can then view/import your clips through Premiere's "Media Browser" window. (Media will be in the "PRIVATE/AVCHD" folder.
Back to the P351 Spring/Fall Home Page / Back up to the P351 Summer Home Page
