

Jim Krause | Classes | P351 Video Field & Post Production
Summer 2018 Week 3 - Wednesday
Announcements/Reality Check/Agenda:
- Midterm Quiz today - short review beforehand.
- Final Project proposals due today (will share Wednesday).
- Discuss and look at examples of lighting setups / Interview/Feature Stories
- Review News Stories & Art Videos
- Wednesday: Lighting lab - Feel fring to bring your DSLR / wear something nice if you want a head shot.
- Lab Friday - Short lab - Jib demo? The rest of the time is for you to shoot your Inte Interview/Feature stories
Production Notes:
- Think about, listen to, and adjust your audio. You usually don't need both left and right audio tracks from a shoot. The primary audio will be on just one (recorded with a lavaliere or shotgun mic). Be sure it's panned center.
- Use the pen tool to adjust/mix your audio.
- Expanded focus button is useful for getting sharp focus.
- Iris / zebra stripes.
- Critique need to be one-page minimum. Look at and think about not just your shots individually but how they work together as a whole. What was the most challenging aspect? What worked or didn't work?
- F-stops
- Going to the next higher f-stop means you are cutting the light entering the lens by 1/2.
- Going to the next lower f-stop means that you are doubling the amount
of light entering the camera.
Whole f-stops: 1 1.4 2 2.8 4 5.6 8 11 16 22 32
Lighting ----------------------------------
Share techniques with lighting for portraiture, fashion, painting.
Unlike the flash photography used for still photography, video requires "constant on" lighting.
Lighting can be thought of in terms of
- Quality (coherence) - Hard vs. Soft
- Color (color temperature)
- Intensity (brightness)
Quality (coherence)
Lighting instruments can be broken down into two major types: spotlights and floodlights. In general, spotlights produce focused beams of light (hard light) whereas floodlights create softer, more diffused light.
Hard light vs soft light
- Hard lighting creates sharply defined shadows and brings out texture
- Soft lighting minimizes shadows and details.
For most interview setups, soft lighting produces more pleasing results than hard lighting.
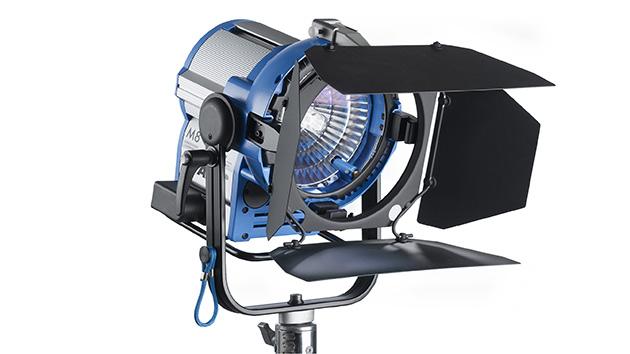
Spotlights generally produce harder, or more focused light than floodlights. There are three basic types: Fresnel, Ellipsoidal, & Open faced.
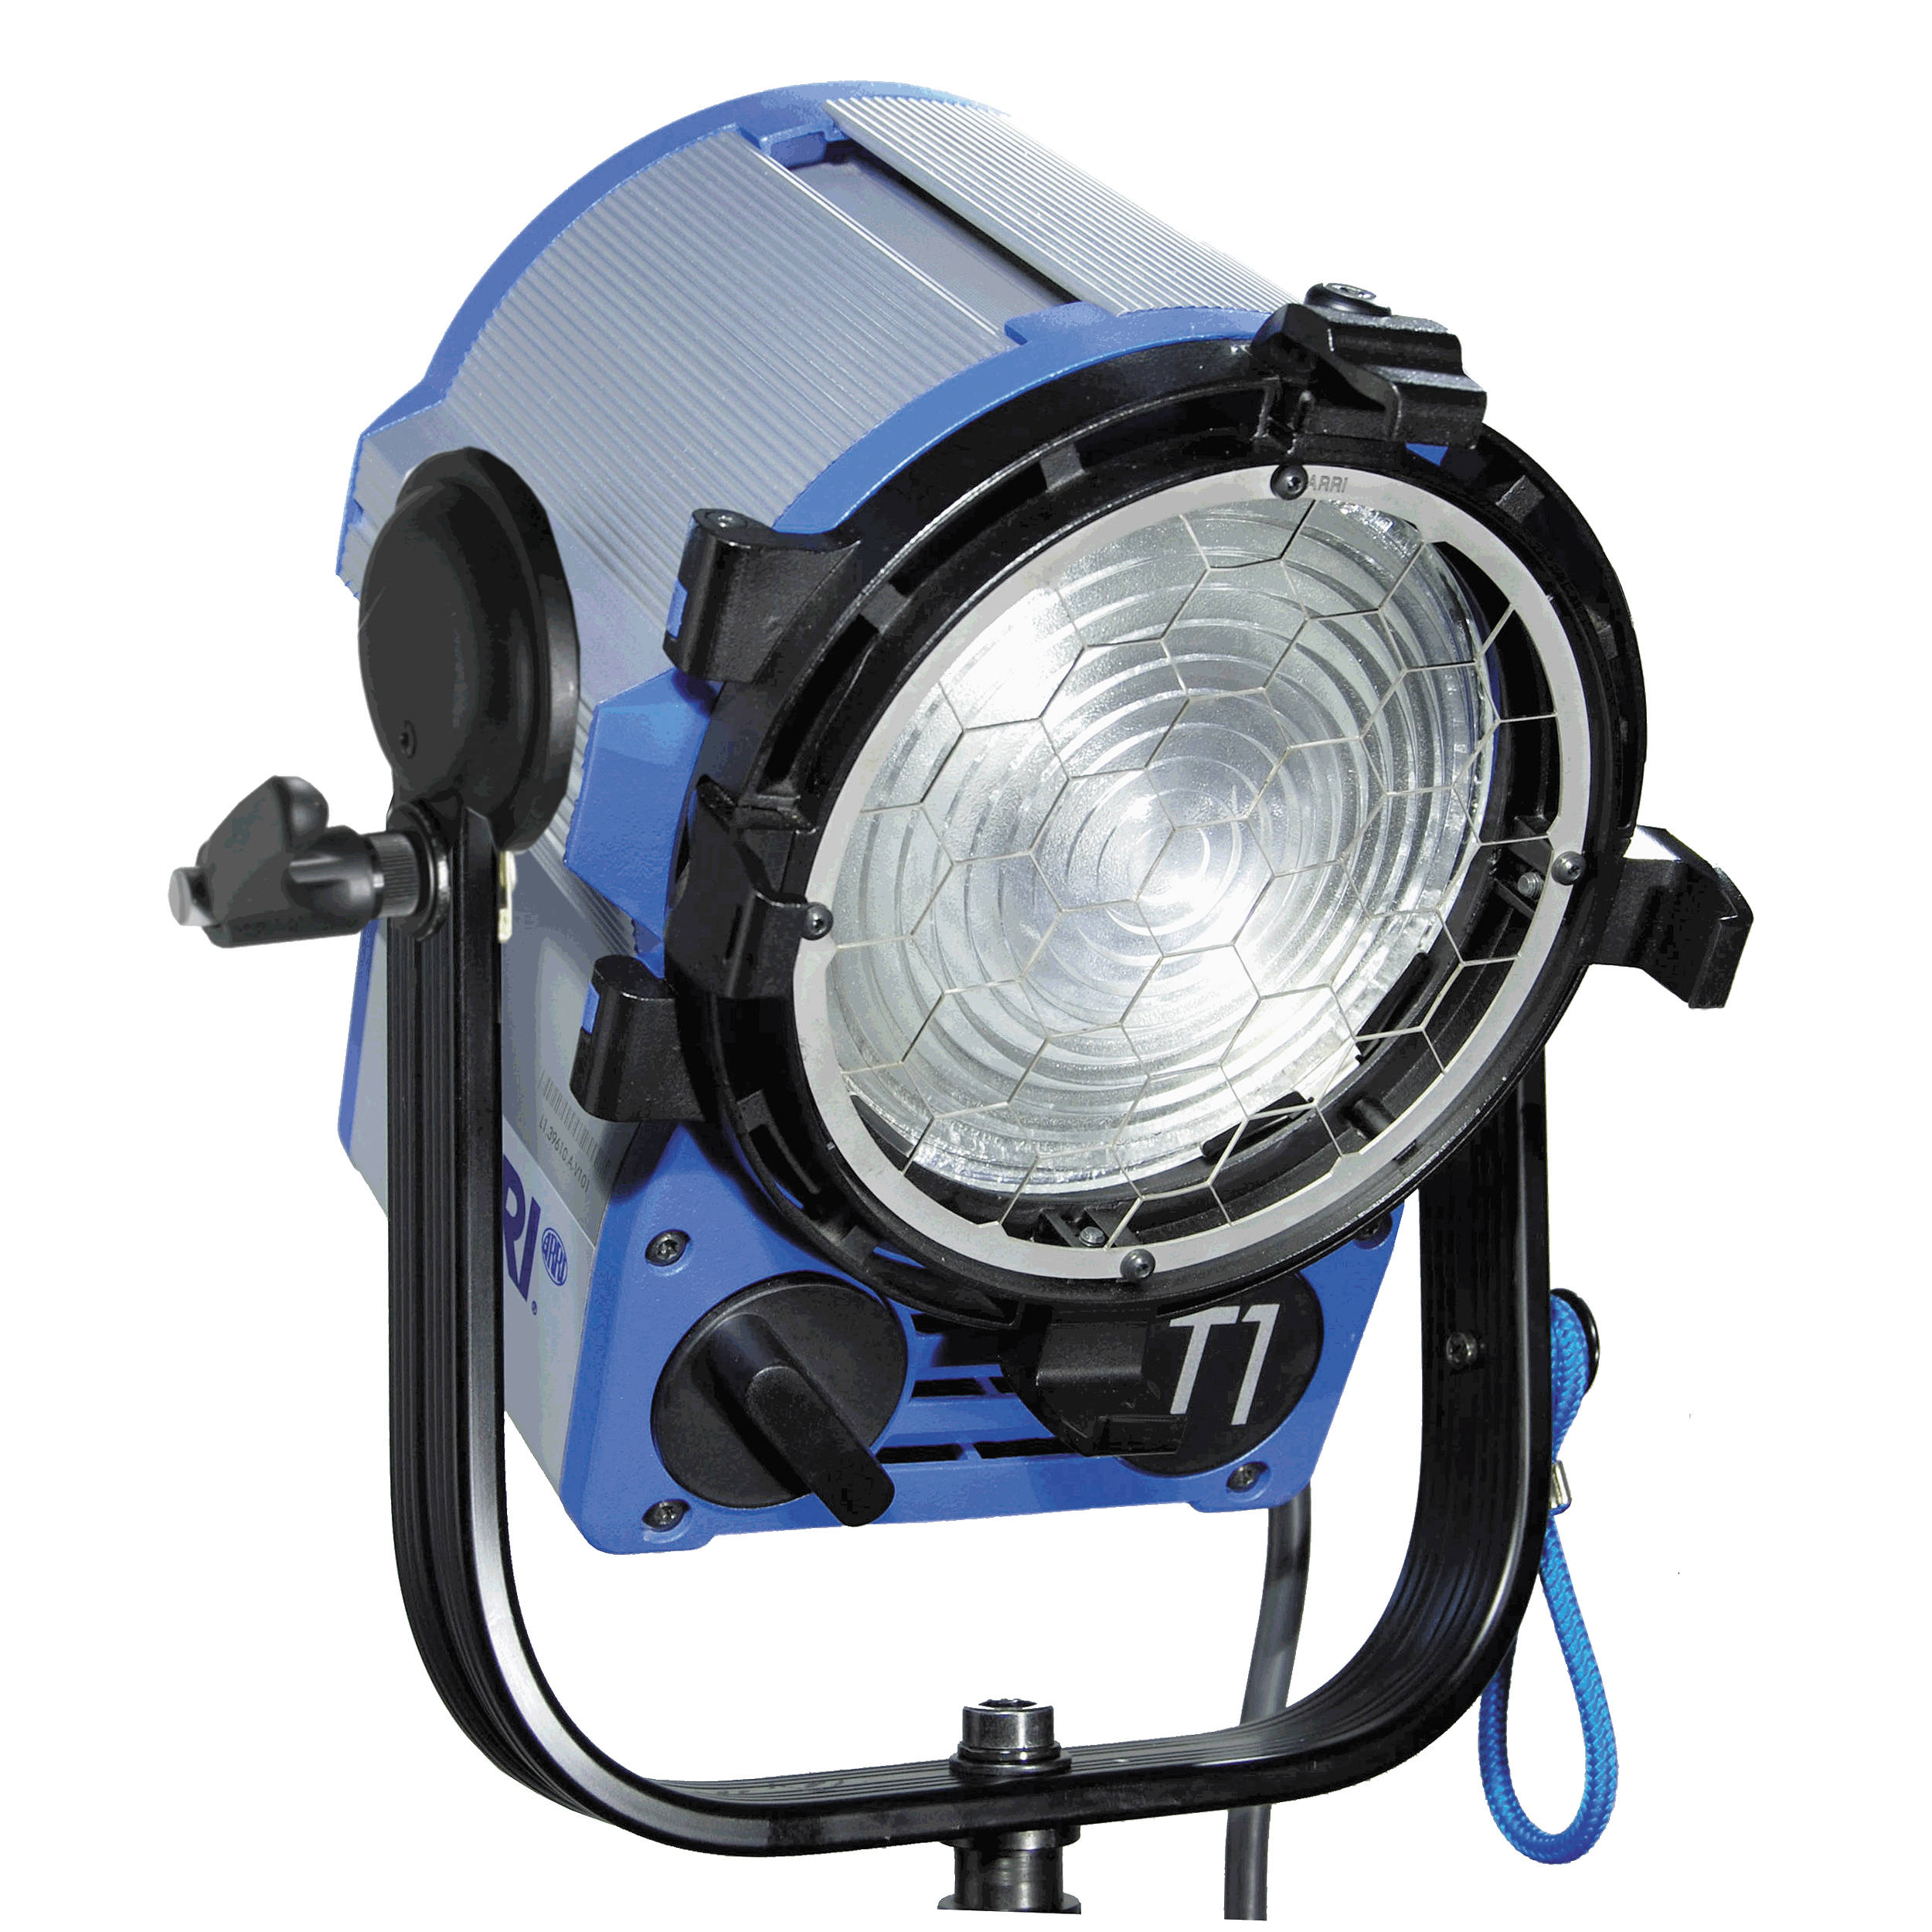
Fresnel - usually ranked by wattage of lamp. Fresnel spotlights use fresnel lenses- these glass lenses have an easily indentifiable series of coencentric rings cut into them to focus the light.
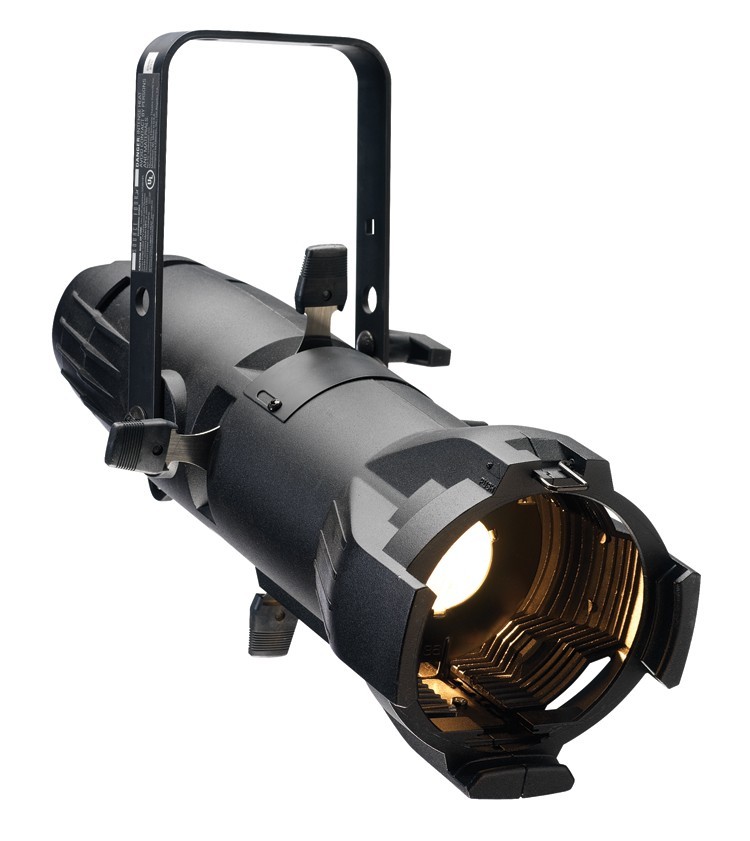
Ellipsoidal - much more directional/focusable than typical fresnel spotlights. Examples include:
- Pattern projectors
- Follow spots
Open faced - In open faced lighting instruments, the lamp is housed in front of a reflector, but there is no lens to focus the light. The Lowell Omni and Tota lights are good examples of open faced spotlights. Lighting people directly with open faced lamps usually looks terrible. The best way to deal with open faced lights is to use an umbrella or a diffuser of some sort.
Floodlights generally produce softer light than spotlights. Examples include:
- Softlights/softboxes: my favorite key light! Chimera, Riffa lights. Many softboxes mount over a spotlight (turning it into a soft light).
- Broad light: Shadows are more defined due to the more focused output. (Not an ideal light source for lighting interviews.)
- Fluorescent & LED light bank: Provide similar light to a softbox, but with LEs or flourescent. Physically, they are shallow (only 6 inches deep or so) so can be placed in tight locations.
Types of lamps (what actually lights up):
- Incandescent: These bulbs are larger than quartz bulbs. These are like the typical screw-in bulbs we use at home. They become redder with age.
- Quartz or Tungsten Halogen: encased in a quartz bulb with halogen gas. Smaller & retains its color temp. Don’t ever touch with bare fingers! It will put oil on the surface and reduce the life span.
- Fluorescent: can be almost any color temp (kinda sorta). Consumer bulbs have uneven color values and often can appear a little green. They can work well when mixed with other light.Professional bulbs (Kino-Flo) work very well.
- HMIs: Hydrargyrum Medium Arc. It's too hard to say so people call them HMIs. HMIs are much more expensive than typical spotlights and are used for outdoor lighting. Sometimes called sun guns, they have the same color temp as the sun. (around 5600 degrees Kelvin).
- LED - Light Emitting Diodes have grown inpopularity due to their variable color temperature, low power consumption, and long life.
Color temperature
We measure color temperature on the Kelvin scale.
Indoor vs. outdoors (approximate/average color temps)
- 3200° Kelvin - indoor color temp
- 5600° Kelvin - outdoor color temp
The outdoor color temperature varies throughout day. If you want to shoot at "golden hour" (sunrise/sunset) remember to use the outdoor preset.
We can vary the color temperature with gels. Gels are useful to add an artistic look/dash of color and to correct.
Two "correction" gels are:
- CTO (Color Temperature Orange) This brings 5600° down to 3200°
- CTB (Color Temperature Blue) This brings 3200° up to 5600°.
So if we wanted to shoot in an office with windows but at an indoor color temp, we could place CTO on the windows. Alternatively if you were shooting outside but needed a little fill from a tungsten/halogen light- you could use a CTB on the light.
Intensity
We measure intensity in lux or foot-candles.
Lux (European) vs. foot-candle aka lumen (American):
- A lux is the amount of light that falls on the surface of a square meter using a candle as a light source burning one meter away
- A foot-candle is the amount of light that falls on the surface of
a square foot using a candle as a light source burning one foot away
The inverse square law states that for every foot you move away from a light source, your intensity will drop off by 1/4
10.75 Lux = 1 foot-candle
Incident vs reflected light
- Incident light: this is a measure of the light falling on a subject
- Reflected light: this is the light bouncing off or reflected from your subject

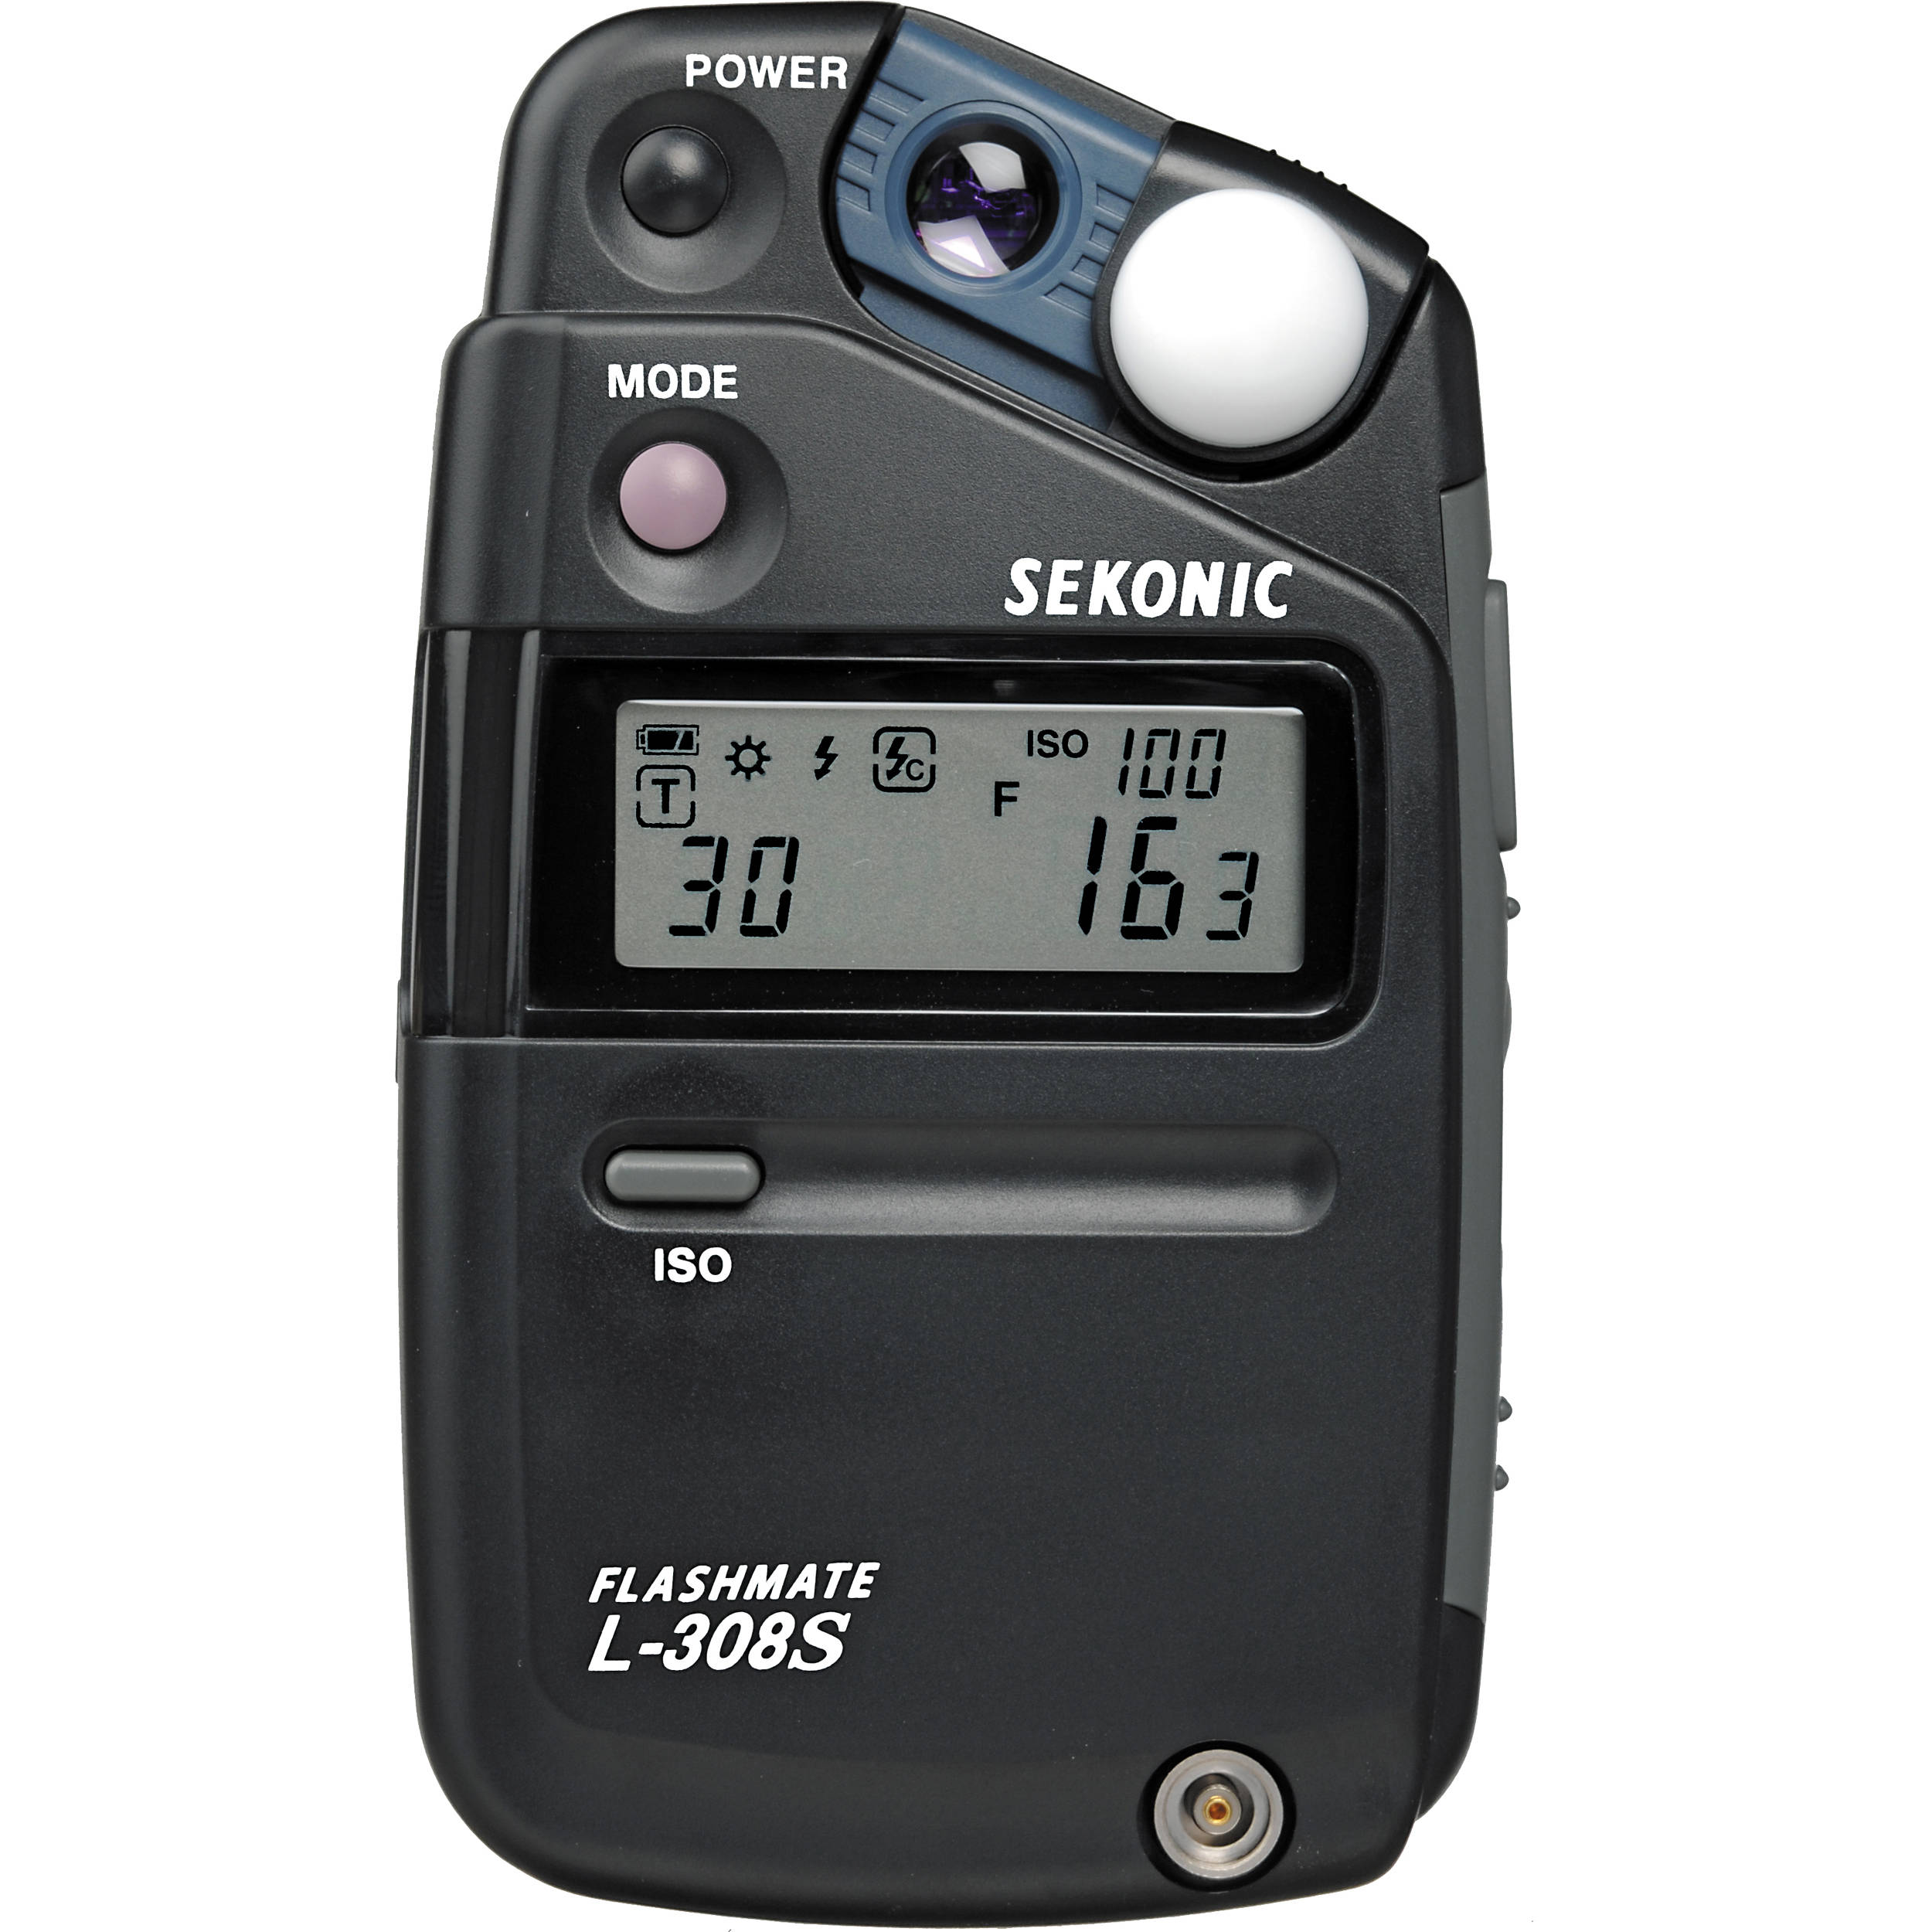
Light meters give us objective means of determining light intensity. To measure reflected light we point the light meter toward the subject. For measuring incident light we place the meter where our subject is and point it towards light source.
Lighting Triangle review:
- Key - illuminates the basic shape of the subject
- Fill - Reduces and fills in shadows created by the key.
- Back -helps separate the subject from the background, creates a figure-ground relationship.
- Background/Set - Lights setting/location. Sets mood and locale of scene.
Key light - For shooting most interviews, soft lighting typically produces more pleasing results than hard lighting. (I usually use a softbox to light my interview/portraiture subjects.) Don't point an open face light at your subject - it looks harsh and is not flattering. A fresnel can give pleasing results. An umbrella can as well but it spills light everywhere. I usually start by placing the key light a little higher that the camera/interviewer. If your subject is wearing glasses you may have to position the key light higher than normal to reduce the reflection.
Fill - If you're using soft key light, a reflector works fine for fill and is easily controllable. You can easily adjust the amount of fill by placement of the reflector and whether you use the white or silver side.
Back light - A little back light goes a long way. I find I'm always using both gels and diffusion to make it look right. (Try turning off your key light to focus and set your backlight.) This is a good light to use colored gels on.
Set light - Highlighting a special something in the background will add the finishing touch. This is also a good place to use colored gels. Remember to throw the background out of focus a little by using a small f-stop coupled with a telephoto lens.
Lighting Control
You can control lighting parameters:
- Quality (hard or soft)
- Color temperature (lamp choice & gels)
- Intensity controls (brightness)
- Area/Directional Control (What area you are lighting)
It's important to be able to control one parameter without affecting another. For instance we might want to adjust intensity without affecting quality. Say we want to light our subject with hard light, but just need to reduce the output. We shouldn't use a diffuser as it would change the light from hard to soft. So as you choose a method to control or shape the light, be aware of how it affects the other parameters.
Ways to control light:
- Placement - Don't forget that placement is directly related to intensity. Move the light further away to reduce the intensity, closer to increase intensity.
- Dimmers - Good dimmers are expensive, but provide an easy way to control intensity. Cheap (inexpensive) dimmers may create audio interference. Variable transformers generally are more expensive, but don't create as much RF noise.
- Gels - Gels come in many colors as well as neutral density (ND). ND gels reduce the lamp's output without affecting quality.
- Scrims - These small screens fit into the lamp's filter holder. You can use a half scrim to block off a portion of the light. Scrims reduce light output without affecting the quality too much.
- Screens/net/mesh - These are often used behind subjects or over windows in order to reduce the intensity.
- Barn doors. Helps control light spill. Stops back light from hitting camera lens & causing lens flare
- Flags - Flags come in many sizes (2x2, 2x4, etc.) and can be clamped to light stands. Flags can contain reflective or diffusion material or can be completely opaque.
- Diffusers - Typically a fabric-like material that can be placed onto a lamp (like a gel) or suspended in a flag or screen. Diffusion softens and reduces the light output.
- Reflectors - Reflectors bounce light onto the subject from an existing light source. Often used to provide a soft fill and can minimize shadows. White, silver and gold are common colors. A sheet of foam core works well as an inexpensive reflector. Glue tinfoil to one side for more lighting options.
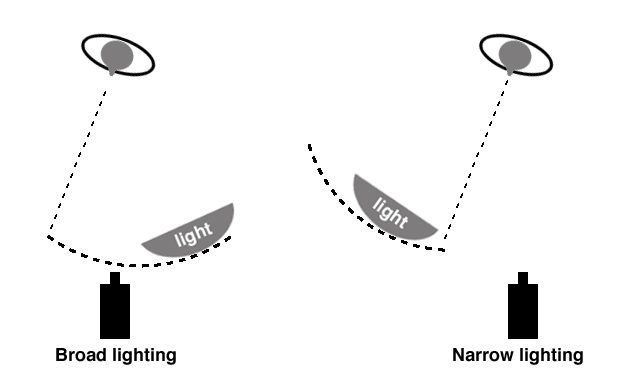
Placing the keylight: Broad (downstage) vs Narrow (upstage) lighting
Consider if you want broad or narrow lighting. Most interviews are shot portrait style- where the talent is slightly askew from the camera, typically facing an off-camera interviewer.
Broad lighting (also known as downstage lighting) is when you position the key light on the camera side of the interviewee's primary vector. Narrow or short lighting (also known as upstage lighting) is when you place the key light on the other side of the primary vector.
Contrast ratio or dynamic range
Audio: This is the difference between the softest and loudest sound
Video: the difference between the darkest part (black) and the brightest part
(white)
Dynamic range is one reason video looks so much different than film.
Video has a limited contrast ratio of about 30:1, (though it’s really
much less)
Film is much better about 80:1
Human vision is better still 100:1
Interview Tips & Tidbits
The interview (setting, lighting, audio, background):
Are there distractions in the background?
Subject lit - stands out from background?
(show clips?)
In general:
Just because the subject is framed well doesn't mean it will look good. It needs to be lit.
Just because the subject is lit doesn't mean it's lit well.
In single camera shoots where you need to shoot the interviewer/reporter , it's possible to shoot questions last, also shoot nods, hmmms, & head turns) You'll need these when you edit.
Interviews/testimonials can be shot in interesting locations.
Where would you shoot the director of the Musical Arts Center? What would be in the background?
What about an ice cream vendor who works out of a van?
Interview / Feature Story Tips
The interview is one of the most common elements found in many types of videos. It's used in feature stories, documentaries, news and magazine shows. Interviews might seem simple, but they require planning, research, interpersonal communication skills and technical mastery.
Here are a few tips to help you approach a feature story based around interviews.
Planning
- Pick a topic & formulate an initial story idea (rough treatment)
- Research and find sources (people, books, articles, etc)
- Talk to people who know about the subject. These are people you can use as resources and who you might want to interview.
- Revise story as you learn more
- Consider the information you want to present. Write questions to draw out the information from the interviewees.
- Narration/VOs can be used for segues or to present information not articulated by interview subjects. (Be sure to use consistently.)
- Think about and plan the B-roll - this is what makes the story visually compelling.
- Plan a site visit to find a suitable location to shoot the interview.
Consider the following:
- Interesting places to shoot the interview.
- Quiet? (fans, construction, car & pedestrian traffic)
- B-roll opportunities?
- Interesting background location? Does it tie in with subject or content, or is it a distraction?
- Enough room to set up lights?
- Enough room to keep talent away from wall?
- Adequate power sources for lights and monitors?
- Draw a site sketch before leaving. You can use this later to create a lighting setup.
- Schedule and coordinate the taping. Be sure to get access to location an hour before the start of the interview. Schedule time to shoot B-roll after the interview.
- Discuss clothing/makeup requirements with talent.
Production Set up
- Assemble proper equipment and supplies
- Get to location an hour before the start of the interview. This will give you time to set lights and check audio. Use yourself or a helper to check framing/ lighting/audio in advance.
- Is camera level? Distractions in the background. Is lighting close to perfect?
- Make a test recording, set timecode, record color bars and wait....
- Make guest feel comfortable, Schmooze and thank your guest often.
- Check talent’s physical appearance (hair, clothing)
- Have talent sign release form.
Production
- Get release signed before you start recording (a necessary formality)
- Monitor audio recording 100% of the time (all it takes is one earbud...)
- After you start recording, ask the subject to spell out his/her name and what the appropriate title should be (for ID graphic).
- Use an “ice-breaker” question to start
- Ask open-ended questions
- Don’t interrupt
- Listen to the responses
- Look interested
- Sometimes you need the question restated in the answer
- Keep your eyes open for potential problems (nervous habits: rocking back and forth, shifty eyes, etc)
Photographer
- Have pan & tilt locks slightly loosened to adjust for talent movement
- Give yourself room for a slow push in if needed. (Use a sloooow zoom in for intense emotional moments)
Wrap
- Ask the talent if there is anything they'd like to add.
- Review part of the interview
- Don’t be afraid to ask the talent to redo parts of the interview if there are any technical problems.
- Shoot appropriate location B-roll.
- Thank your talent
- Shut lights off immediately and strike all other equipment before putting lights away
- Remember which batteries are dead, which have some use and which are still fresh.
Editing (a short interview/feature story)
- Open with something interesting (montage, nice image, etc.) Ideally this might tie into the ending.
- Do not spend much screen time on graphics. A simple title and "produced by" keyed in somewhere near the beginning is sufficient. You do NOT need or want rolling credits at the end.
- Cover your edits with B-roll sequences
- Start in black and end in black
Back to Jim Krause's Summer P351 Home Page
